-1.png?width=1920&height=970&name=Juno%20Tax%20Prep%20Advisory%20Review%20(1)-1.png)
Step 1: Start a Tax Preparation and Select a Client
To start tax preparation for a client you’ll want to select the “Start Tax Preparation” button in the upper right of your screen. Now select the return type you would like to begin, select "Continue", then either select the client from the drop down if they exist in Juno already, or "Add New Client" if this is their first preperation. Lastly select which year you will be preparing.
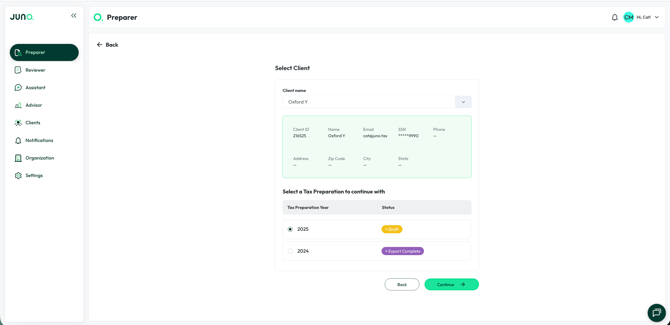
Note: Juno Supports preparations for 2024 and later. We do not currently allow creation of multiple preparations for a single year.
Step 2: Upload Source Documents
Now you’re ready to start uploading source documents. Upload this year's source documents for the client by dragging and dropping them into the upload container or via an integration with file storage platforms. You can also include the client's prior year return in the same upload. The source documents you have added will display on the right side of your page like below:
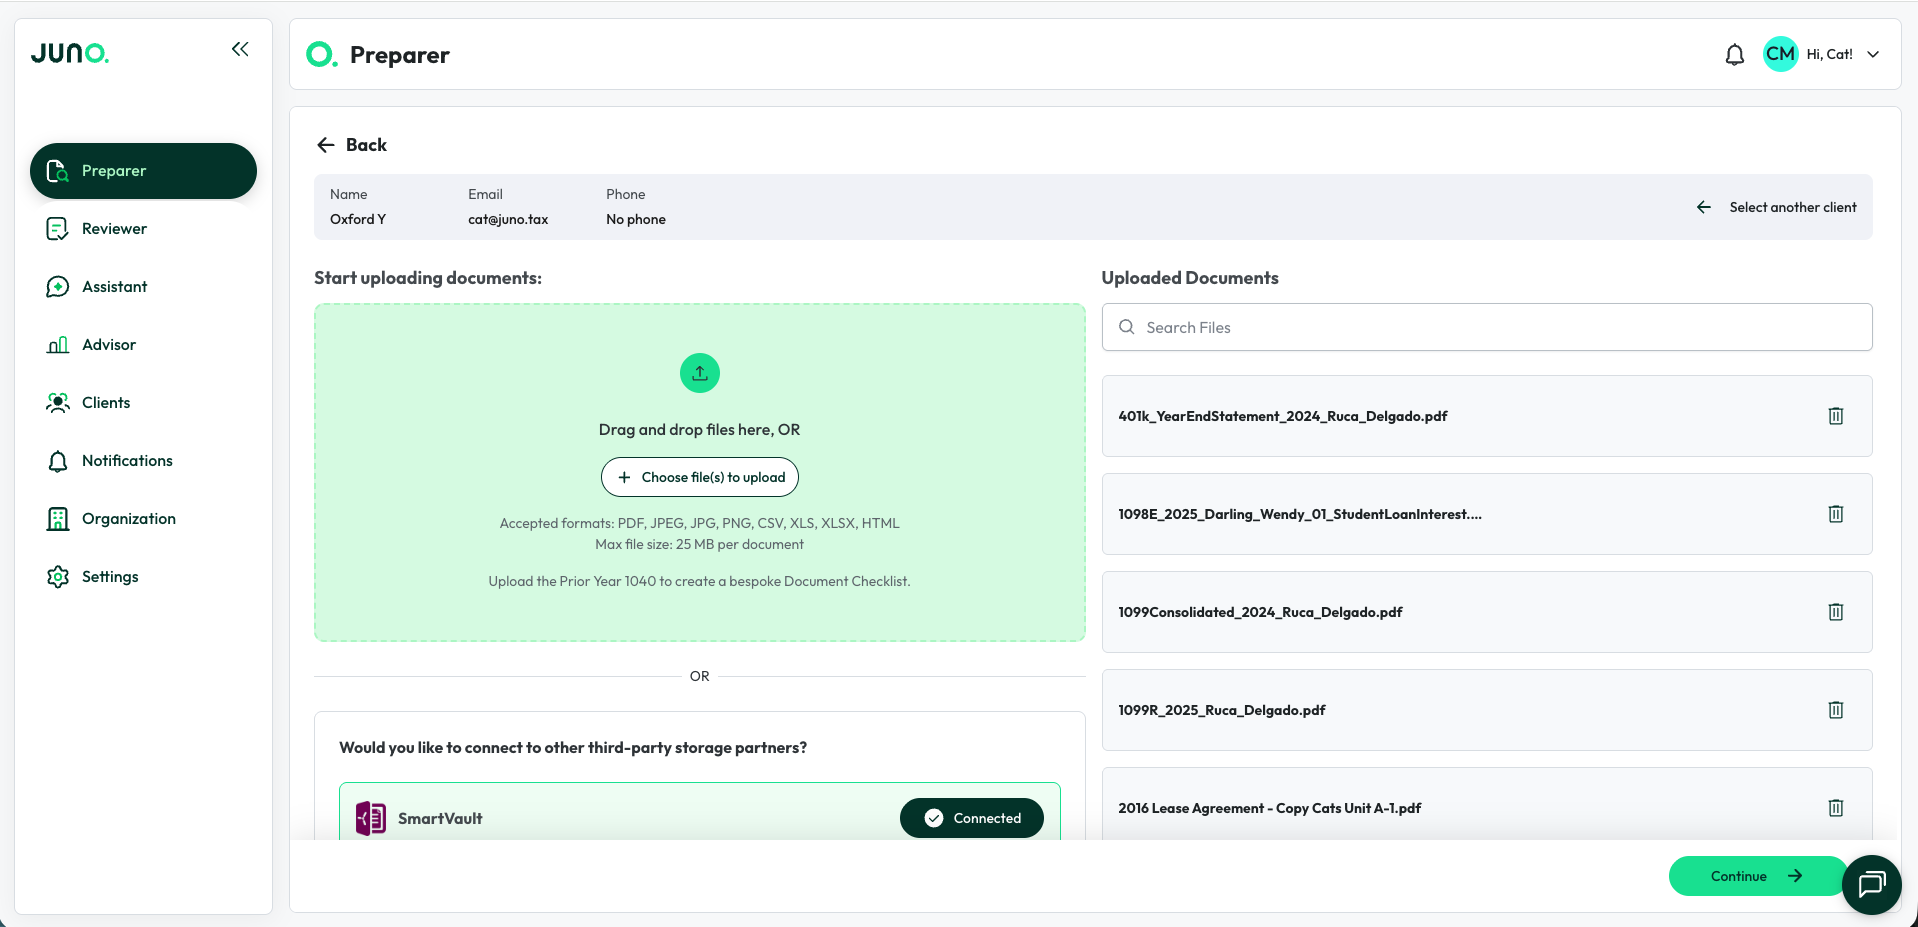
Upon hitting "Continue" Juno will classify your source documents and begin data extraction.
For a full list of source documents that we can process please click here.
Step 3: Reviewing Source Documents
Upon proceeding to the Source Document Review screen, your source documents will begin processing. As they become available for review you will see the status of each document update accordingly.
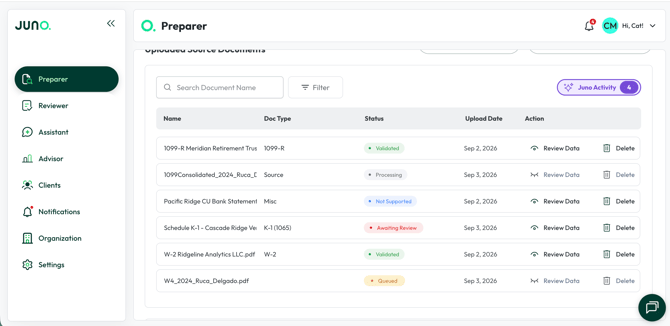
Once your source documents display a status of “Awaiting for Review” they are ready for you to begin validation, which you can do so by clicking “Review Data.” You can always return to the previous step to add more source documents.
It’s important to note that some of your source documents may immediately receive the “Validated” status. This means our software was highly confident in extracting all the data fields and there weren’t any instances that required review. You can of course click in to view these documents.
Once all your source documents receive the status of “Validated” or "Not Supported" you’ll be able to proceed to the next step and download both a workpaper and a bookmarked PDF of the uploaded source documents. Be sure to scroll down to see how much work Preparer saved you.
Step 4: Viewing Documents in Our Human In the Loop process
You may click ‘Review Data’ on any document in the table once it has been processed. This will display the document on the left side, with the extracted data on the right.
PDF documents may contain multiple distinct tax forms. Each tax form found in the document will be displayed in sections on the right. These sections are collapsable and expandable by clicking on the header as seen below:
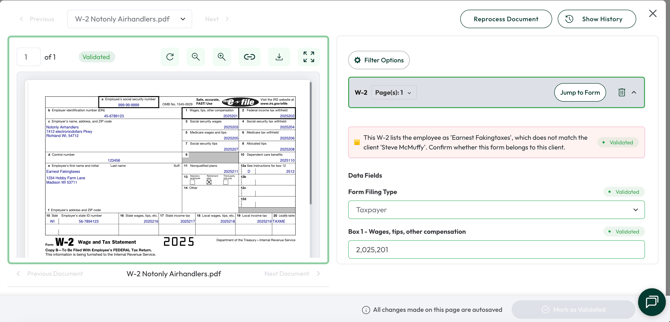
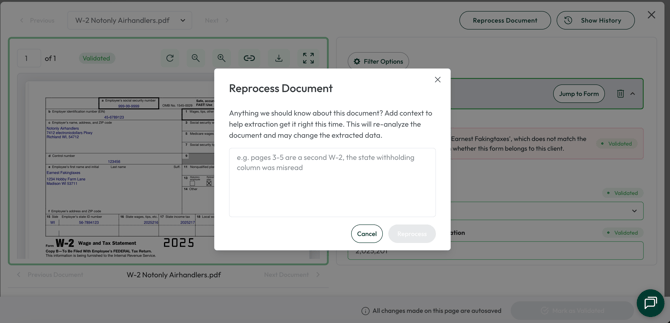
There are a few useful tools in the header. It will first display the form type, followed by the page numbers that data for this form is found on. If you would like the document to be reprocessed select "Reprocess Document", then give a short description of how you would like Juno to process this document.
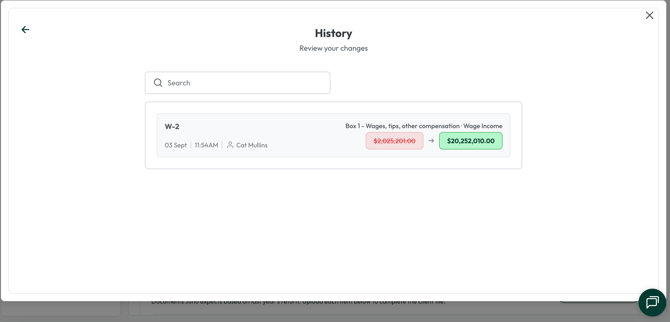
There is also a "Show History" Option to show all changes made on this screen.
You may also click the ‘Jump to Form’ button to instantly display the page associated with this form in the document viewer on the left.
Finally, if you would like to remove a tax form you may hit the trash icon to delete that form from the document.
In very rare cases, Preparer may miss a tax form on a PDF. In these rare scenarios, first delete the source document and reupload it. If the issue persists, there is a button below the tax forms which will allow you to manually enter data for that form. Clicking this button will display a list of possible tax forms you may wish to add, and selecting anything from the list will add that form to the document.

Step 5: Validating Source Documents
Once you click “Review Data” you’ll be able to validate your documents. We call this the “Human in the loop” process. It’s important to know what each field status means:
- Possibly Missing - The system did not extract a value and believes there might be a value missing. In most cases, fields with this status are blank on the form and require you to validate that it is in fact blank. You can do this by hitting the “Validate” button below the field.
- Flagged for Review - The system suggests taking a look at this field to double check. Often times a value may be calculated (gain/loss on a 1099B) but the system will request verification of correctness.
- Validated - The value was extracted with near perfect confidence and doesn’t require review.

In order for a document to receive the status of “Validated” you must either validate all individual fields or select the “Mark All as Validated” button at the bottom of the page.
You'll notice if you're validating Schedule C, E or F documents that the interface is a bit different than the above. For a quick walkthrough on how to validate Schedules, please check out this video.
Document Checklist & Client Letter Experience in Preparer
When you start a new tax preparation you have the option to upload a Prior Year 1040 on the standard document upload screen.
If you upload the prior year return, Juno runs a checklist agent against it and populates a new “Expected Documents Checklist” module on the Uploaded Source Docs screen. This checklist lists the specific documents your client is expected to provide — document type plus issuer where known (e.g. “2026 W-2 Disney”) — and each item has its own Upload and Remove actions.


A new “Prior Year 1040” toggle in Org Settings is on by default. Firms can use this toggle to opt out of this flow entirely.
Building on the Expected Documents Checklist, a new “Generate Email” button on the Uploaded Source Docs screen lets you auto-draft a client email listing the still-missing documents. You can edit the draft and copy it before sending.

Explaining Date Acquired and Date Sold Logic in Juno
When Juno processes forms containing transactions, individual transactions are aggregated into summary rows. These rows are grouped by transaction type (short-term vs. long-term) and reporting status. Because these entries are aggregated, tax software requires standardized placeholder values for certain fields.
Year-Specific Behavior
Juno automatically applies the correct year-specific dates based on the return you’re preparing. The long-term acquisition date stays the same because it represents assets held for more than one year.
User Experience
These dates and quantities are expected and won’t affect the accuracy of your reported gains or losses. They’re simply placeholders that allow your 1099-B data to be accepted and processed correctly by tax software.

Next Step: Exporting Data to ProConnect
Now you're ready to see all that extracted data moved to ProConnect. You'll want to open the Juno Desktop Application to initiate the export. For detailed steps on how to do so please view our Exporting Tax Preparations to ProConnect - Step By Step Guide.